Killexams MB-800 Exam Braindumps includes latest syllabus of Microsoft Dynamics 365 Business Central Functional Consultant exam with up-to-date exam contents | Actual Questions - Mahfia.tv
PDF Exam Questions and Answers : MB-800 Exam Braindumps contains complete pool of MB-800 Questions and answers in PDF format. PDF contains actual Questions with April 2024 updated Microsoft Dynamics 365 Business Central Functional Consultant Braindumps that will help you get high marks in the actual test. You can open PDF file on any operating system like Windows, MacOS, Linux etc or any device like computer, android phone, ipad, iphone or any other hand held device etc. You can print and make your own book to read anywhere you travel or stay. PDF is suitable for high quality printing and reading offline.
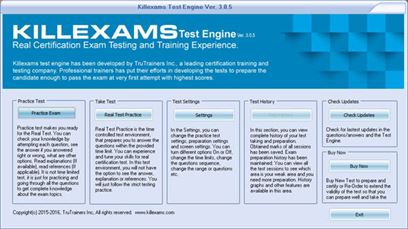
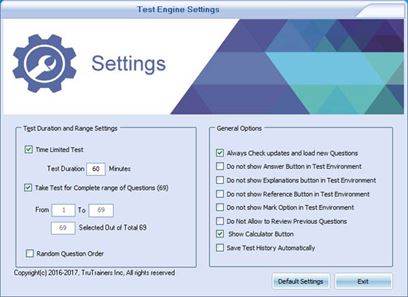
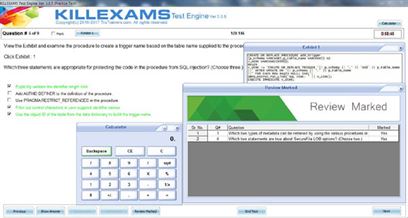
VCE Exam Simulator 3.0.9 : Free MB-800 Exam Simulator is full screen windows app that is like the exam screen you experience in actual test center. This sofware provide you test environment where you can answer the questions, take test, review your false answers, monitor your performance in the test. VCE exam simulator uses Actual Exam Questions and Answers to take your test and mark your performance accordingly. When you start getting 100% marks in the exam simulator, it means, you are ready to take real test in test center. Our VCE Exam Simulator is updated regularly. Latest update is for April 2024.
Microsoft MB-800 Exam Braindumps
We offer Microsoft MB-800 Exam Braindumps containing actual MB-800 exam questions and answers. These Exam Braindumps are very useful in passing the MB-800 exams with high marks. It is money back guarantee by killexams.com
Real Microsoft MB-800 Exam Questions and Answers
These MB-800 questions and answers are in PDF files, are taken from the actual MB-800 question pool that candidate face in actual test. These real Microsoft MB-800 exam QAs are exact copy of the MB-800 questions and answers you face in the exam.
Microsoft MB-800 Practice Tests
MB-800 Practice Test uses the same questions and answers that are provided in the actual MB-800 exam pool so that candidate can be prepared for real test environment. These MB-800 practice tests are very helpful in practicing the MB-800 exam.
Microsoft MB-800 Exam Braindumps update
MB-800 Exam Braindumps are updated on regular basis to reflect the latest changes in the MB-800 exam. Whenever any change is made in actual MB-800 test, we provide the changes in our MB-800 Exam Braindumps.
Complete Microsoft MB-800 Exam Collection
Here you can find complete Microsoft exam collection where Exam Braindumps are updated on regular basis to reflect the latest changes in the MB-800 exam. All the sets of MB-800 Exam Braindumps are completely verified and up to date.
Microsoft Dynamics 365 Business Central Functional Consultant Exam Braindumps
Killexams.com MB-800 Exam Braindumps contain complete question pool, updated in April 2024 including VCE exam simulator that will help you get high marks in the exam. All these MB-800 exam questions are verified by killexams certified professionals and backed by 100% money back guarantee.
MB-800 Microsoft Dynamics 365 Business Central Functional Consultant study tips | [HOSTED-SITE]
MB-800 study tips - Microsoft Dynamics 365 Business Central Functional Consultant Updated: 2024
Once you memorize these MB-800 Q&A, you will get 100% marks.
MB-800 Microsoft Dynamics 365 Business Central Functional Consultant
Test Detail:
The Microsoft MB-800 exam, also known as the Microsoft Dynamics 365 Business Central Functional Consultant exam, is a certification test offered by Microsoft. It is designed to validate the skills and knowledge of professionals working as functional consultants with Microsoft Dynamics 365 Business Central, an enterprise resource planning (ERP) solution. The test assesses the candidate's ability to implement, configure, and customize various features and functionalities of Business Central.
Course Outline:
The Microsoft Dynamics 365 Business Central Functional Consultant course provides comprehensive training on the implementation and customization of Business Central. It covers various courses related to configuring core application functionality, implementing financial management, managing sales and purchasing processes, and performing system administration tasks. While the specific course content may vary, the following is a general outline of the key courses covered:
1. Introduction to Microsoft Dynamics 365 Business Central:
- Overview of Business Central and its key features.
- Understanding the role of a functional consultant in Business Central projects.
- Exploring the Business Central interface and navigation.
2. Core Application Setup and Configuration:
- Configuring company settings and parameters in Business Central.
- Setting up chart of accounts, dimensions, and posting groups.
- Defining user roles, permissions, and security settings.
- Configuring workflows, approvals, and notifications.
3. Financial Management:
- Setting up and managing general ledger accounts.
- Configuring cash flow forecasting and budgeting.
- Implementing fixed assets management.
- Performing bank reconciliations and financial reporting.
4. Sales and Purchasing Management:
- Managing customer and vendor records in Business Central.
- Setting up and managing sales and purchase documents.
- Configuring pricing, discounts, and sales tax.
- Handling sales and purchase returns and refunds.
5. Inventory and Warehouse Management:
- Configuring item and inventory management in Business Central.
- Implementing inventory valuation methods and costing.
- Managing warehouses, locations, and bin setups.
- Performing inventory counts and adjustments.
6. System Administration and Data Migration:
- Performing system administration tasks in Business Central.
- Managing user roles, security, and access control.
- Performing data migration and data import/export operations.
- Monitoring system performance and troubleshooting issues.
Exam Objectives:
The Microsoft MB-800 test evaluates candidates' knowledge and skills in implementing and customizing Microsoft Dynamics 365 Business Central as a functional consultant. The test objectives include, but are not limited to:
1. Core Application Setup and Configuration:
- Configuring company settings, parameters, and user roles.
- Defining chart of accounts, dimensions, and posting groups.
- Configuring workflows, approvals, and notifications.
2. Financial Management:
- Setting up general ledger accounts and financial reporting.
- Managing cash flow forecasting, budgeting, and fixed assets.
- Performing bank reconciliations and financial analysis.
3. Sales and Purchasing Management:
- Managing customer and vendor records in Business Central.
- Configuring sales and purchase documents and pricing.
- Handling sales and purchase returns and refunds.
4. Inventory and Warehouse Management:
- Configuring item and inventory management in Business Central.
- Implementing inventory valuation methods and costing.
- Managing warehouses, locations, and bin setups.
5. System Administration and Data Migration:
- Performing system administration tasks in Business Central.
- Managing user roles, security, and access control.
- Performing data migration and data import/export operations.
Syllabus:
The Microsoft Dynamics 365 Business Central Functional Consultant course syllabus provides a detailed breakdown of the courses covered in the training program. It includes specific learning objectives, hands-on exercises, and practical examples. The syllabus may cover the following areas:
- Introduction to Microsoft Dynamics
365 Business Central
- Core Application Setup and Configuration
- Financial Management in Business Central
- Sales and Purchasing Management in Business Central
- Inventory and Warehouse Management in Business Central
- System Administration and Data Migration in Business Central
Microsoft Dynamics 365 Business Central Functional Consultant Microsoft Functional study tips
killexams.com test prep material gives you all that you need to pass MB-800 exam. Our MB-800 MB-800 dumps come up with questions that are exactly same as real exam. High caliber and incentive for the MB-800 Exam. We at killexams ensures your success in MB-800 test with our braindumps.
MB-800 Dumps
MB-800 Braindumps
MB-800 Real Questions
MB-800 Practice Test
MB-800 dumps free
Microsoft
MB-800
Microsoft Dynamics 365 Business Central Functional
Consultant
http://killexams.com/pass4sure/exam-detail/MB-800 Question: 127
You create a test instance of Dynamics 365 Business Central and enter transactions for testing purposes.
You create a production company instance in the same Business Central environment. You need to copy the setup and
master data from the test instance to the production instance without copying transaction data.
What are two possible ways to achieve the goal? Each correct answer presents a complete solution. NOTE: Each
correct selection is worth one point.
A. Use the Run Migration Now function from Cloud Migration Management
B. Create and export a configuration package from the source company. Next, import into the destination company
C. Use the Copy Data from Company function from the Configuration Worksheet page
D. Use the Copy function from the Companies page Answer: BD Question: 128
DRAG DROP
You are setting up approval workflows in Dynamics 365 Business Central. You need to configure approval limits.
Which approver limit types should you use? To answer, drag the appropriate approver limit types to the
correct requirements. Each approver limit type may be used once, or not at all. You may need to drag the split bar
between panes or scroll to view content. NOTE: Each correct selection is worth one point. Answer:
Explanation:
Reference: https://ebs.com.au/blog/how-approver-limit-type-works-for-purchase-order-workflows-in-microsoft-
dynamics-365 Question: 129
You are implementing Dynamics 365 Business Central Online. Users must be added to Business Central for the first
time. You need to add the users.
Which action should you use?
A. Get New Users from Office 365
B. Create a new entry on the User Setup page
C. Update Users from Office 365
D. Import User Groups Answer: A
Explanation:
Reference: https://dankinsella.blog/add-user-in-business-central-cloud/ Question: 130
DRAG DROP
You set up a new company for a customer. The customer provides you with a Microsoft Excel file that contains master
data. You need to import the master data by using configuration packages.
Which four actions should you perform in sequence? To answer, move the appropriate actions from the list of actions
to the answer area and arrange them in the correct order. Answer:
Explanation:
Reference:
https://docs.microsoft.com/en-gb/dynamics365/business-central/admin-how-to-prepare-a-configurationpackage
https://docs.microsoft.com/en-gb/dynamics365/business-central/admin-how-to-configure-new-companies Question: 131
DRAG DROP
You are creating companies for multiple customers in the cloud-based version of Dynamics 365 Business Central by
using the assisted setup guide. You need to create new companies.
Which templates should you use? To answer, drag the appropriate templates to the correct requirements. Each template
may be used once, more than once, or not at all. You may need to drag the split bar between panes or scroll to view
content. NOTE: Each correct selection is worth one point. Answer:
Explanation:
Reference: https://docs.microsoft.com/en-gb/dynamics365/business-central/about-new-company Question: 132
Question Set 1
You are creating payment terms. A company processes standard vendor payments on the seventh day of the next
month. You need to set up payment terms for the vendor.
Which date formula should you use?
A. 37D
B. 1M+7D
C. 1M+6D
D. CM+7D Answer: D
Explanation:
Reference: https://business-central.to-increase.com/md/en-US/ui-enter-date-ranges Question: 133
Testlet 3
This is a case study. Case studies are not timed separately. You can use as much test time as you would like to
complete each case . However, there may be additional case studies and sections on this exam. You must manage your
time to ensure that you are able to complete all questions included on this test in the time provided.
To answer the questions included in a case study, you will need to reference information that is provided in the case
study. Case studies might contain exhibits and other resources that provide more information about the scenario that is
described in the case study. Each question is independent of the other questions in this case study.
At the end of this case study, a review screen will appear. This screen allows you to review your answers and to make
changes before you move to the next section of the exam. After you begin a new section, you cannot return to this
section.
To start the case study
To display the first question in the case study, click the Next button. Use the buttons in the left pane to explore the
content of the case study before you answer the questions. Clicking these buttons displays information such as
business requirements, existing environment, and problem statements. When you are ready to answer a question, click
the Question button to return to the question.
Current environment
Deliveries
� The company receives daily truckloads of products from their vendors, warehouses the products briefly, and then
ships orders based on a weekly delivery cycle to each customer�s store.
� Customers have regular standing orders that are revised and finished one week prior to delivery.
� Best for You Organics has a fleet of trucks that make deliveries according to planned routes.
� The company also has a floating route for trucks to deliver rush orders. The route is being used more often by
customers and has overwhelmed the warehouse with exception processing.
Duties
The company wants to provide greater separation of duties between activities in the office and activities in the
warehouse.
The accounting team enters orders for the sales team, sends pick tickers back to the warehouse, and organizes shipping
documents. The accounting team invoices the orders when they receive instructions from the warehouse that an order
shipped.
Employees have expressed frustration because they need to work longer hours to accommodate the increase in sales.
The company does not use the Advanced Warehousing function.
Requirements
Salespeople
� Salespeople must be able to manage opportunities that are converted to quotes.
� Salespeople must be able to release orders to the warehouse to be fulfilled once a quote is final.
� Salespeople must be trained on how to determine if inventory is available when they are completing the quote to
avoid promising inventory that is not on hand because all orders are processed one week in advance of delivery.
Team responsibilities
Deliveries must be shipped daily by employees in the warehouse. The office must be responsible for completing the
invoicing process.
The current team responsibilities are shown in the following graphic:
The required team responsibilities are shown in the following graphic:
Vendor management
� The company contracts with each vendor for regular discounts at the invoice level.
� The company requires a pre-set discount percentage to calculate automatically when the purchaser completes a
purchase order.
� The company must be able to see a copy of the completed purchase order in the system when they have new contract
negotiations with their vendors.
Customer and inventory management
� Sales invoices must be automatically emailed by the system to customers.
� A template must be used for emails sent to customers. The template must not be altered.
� Customers who pre-pay their invoices must not receive a copy of their invoices.
� The company warehouses all products as Case quantities. The company has difficulty recording accurate costs for
product returns. The company wants to expand their capabilities for managing returns by setting up all inventory in a
quantity of Each.
Reporting
The company must be able to answer two key questions when they report financial results:
� Which customers are buying which items?
� Which salespeople are selling in which regions?
When discussing customers, the company must refer to each Customer Group as follows:
� Big Box
� Franchise
� Private
When discussing items, the company must refer to each Item Group as follows:
� Fair Trade
� Free Range
� Grass Fed
� Heirloom
� Organic
Salesperson names that must be used are:
� SalespersonA
� SalespersonB
� SalespersonC
� SalespersonD
Region names that must be used are:
� North
� South
� East
� West
Commission
� The company must be able to track salesperson performance within certain regions to calculate commission.
� Each salesperson must be assigned only to a single region.
� This commission data is currently recorded inconsistently, resulting in incorrect combinations that require manual
correction. The company must have some level of automation to manage this.
Issues
Issue 1
The accounting team needs an improved process for reconciling inventory to the general ledger.
� Posted transactions are changing financial reporting in periods that have been closed.
� Unexpected changes in inventory cost for previous months are causing costing inaccuracies.
� The system must restrict the adjustment of costs for closed months.
� The new policy will be to restrict all users to posting in the current month only, with the exception of a few
employees from the accounting team.
� The calendar fiscal year for company must begin on June 1.
Issue 2
The accounting team uses a complex manual accrual process to determine the accounting impact of items received but
not invoiced. The system must streamline the item accrual process.
Issue 3
The company often receives a higher quantity of produce items than what they order because vendors allow for
spoilage or damage of produce in transit. The company does not want to allow over receipt on non-produce items.
Issue 4
The company has received comments from their auditors that invoices are not being properly compared to received
inventory documents before they are posted. The company does not use warehouse management and always handles
processes directly from the purchase order.
The company always has the following documents:
� purchase order from the procurement department
� receiving document from the warehouse
� electronic invoice from the vendor
HOTSPOT
You need to configure reporting.
What should you do? To answer, select the appropriate options in the answer area. NOTE: Each correct selection is
worth one point. Answer: Question: 134
DRAG DROP
You are creating companies for multiple customers in the cloud-based version of Dynamics 365 Business Central by
using the assisted setup guide. You need to create new companies.
Which templates should you use? To answer, drag the appropriate templates to the correct requirements. Each template
may be used once, more than once, or not at all. You may need to drag the split bar between panes or scroll to view
content. NOTE: Each correct selection is worth one point. Answer:
Explanation:
Reference: https://docs.microsoft.com/en-gb/dynamics365/business-central/about-new-company Question: 135
You configure a cloud-based printer in Dynamics 365 Business Central. Purchase orders printed by users must
automatically print to the cloud-based printer. You need to create a setup record for the user, report, and printer
combination.
On which page should you create the setup record?
A. Printer Selections
B. Printer Management
C. Report Layout Selection
D. Report Selection C Purchase
E. Document Sending Profiles Answer: A
Explanation:
Reference: https://docs.microsoft.com/en-gb/dynamics365/business-central/ui-specify-printer-selection-reports Question: 136
A company uses Dynamics 365 Business Central.
The company wants to print financial statements by using a cloud-based printer.
You need to recommend the type of printer the customer should install.
Which type of printer should you recommend?
A. Email
B. System
C. Client default
D. Server default Answer: A Question: 137
DRAG DROP
You are creating companies for multiple customers in the cloud-based version of Dynamics 365 Business Central by
using the assisted setup guide. You need to create new companies.
Which templates should you use? To answer, drag the appropriate templates to the correct requirements. Each template
may be used once, more than once, or not at all. You may need to drag the split bar between panes or scroll to view
content. NOTE: Each correct selection is worth one point. Answer:
Explanation:
Reference: https://docs.microsoft.com/en-gb/dynamics365/business-central/about-new-company
For More exams visit https://killexams.com/vendors-exam-list
Kill your test at First Attempt....Guaranteed!
Microsoft Functional study tips - BingNews
https://killexams.com/pass4sure/exam-detail/MB-800
Search resultsMicrosoft Functional study tips - BingNews
https://killexams.com/pass4sure/exam-detail/MB-800
https://killexams.com/exam_list/MicrosoftMicrosoft Word accessibility tips
Creating accessible Microsoft Word documents is relatively easy when you know what is required. Word also has a real time accessibility checker that alerts you to errors and provides accessibility warnings and tips.
Accessible Word documents should have the following features:
Proper heading structure
Properly formatted lists
Image descriptions (alt text) for all non-textual/graphical elements
Tables with header columns and rows (if present) specified
Images that are inline with the text (if saving as Word documents and not converting to PDF)
Descriptive hyperlinks (if intended for online delivery)
Using the accessibility checker in Microsoft Word
The Word accessibility checker indicates errors and warnings for items that may affect understanding or functionality for users with disabilities and provides and tips for making additional accessibility improvements.
PC
Older versions (some versions of Office 2019 and prior):
Step 1: Click File
Step 2: Click the Check for Issues button and select Check Accessibility
[Figure 1] Screen clipping of the Info screen in older versions of Word with the Check for Issues button circled and an arrow pointing to the Check Accessibility option.
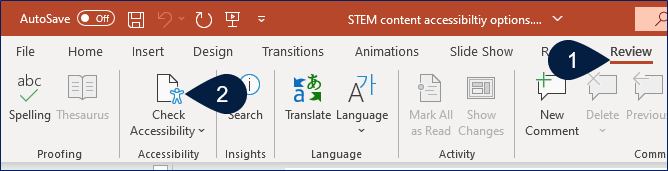
Recent versions (Office 2019 and more recent, Office 365):
Step 1: Click the Review tab
Step 2: Click Check Accessibility in the Accessibility group
[Figure 2] Screen clipping of the Word interface with the Review tab circled and an arrow pointing to the Check Accessibility option.
Once the accessibility checker is active, you can click on the listed items to gain more information about the errors, warnings, and tips and where they occur in the document.
Mac
Step 1: Click the Review tab
Step 2: Click Check Accessibility
Once the accessibility checker is active, you can click on identified items to gain more information about the errors, warnings, and tips and where they occur in the document.
Accessible headings in Microsoft Word
Headings define the structure of a document and allow users to quickly navigate to specific content. They are essentially an organizational outline shown within the paragraph structure of a document.
Headings have different levels that correspond to the topical structure of a document. Heading level 1 (h1) is a main Topic or title, heading level 2 (h2) is a sub-topic, heading level 3 (h3) is a sub-sub topic, and so on. Think of heading levels as you do outline structure.Heading levels 1 (h1) through level 6 (h6) may be used to designate document structure.
How to create and use headings in Word
You'll find headings under the Home tab in the Styles group. Click within the content you want to change to a heading and choose the appropriate heading level or use Normal for normal paragraph text. If you highlight only a portion of text, only the highlighted portion will change to the selected heading. This technique is sometimes used when a content creator wants headings to be in-line with the text instead of on a separate line above the text section.
You may only see Heading 1 and Heading 2 in the styles group at first; once you use a Heading 2, Heading 3 will appear and so on.
[Figure 3] Screen clipping of the Word interface Home tab with a circle around headings and Normal in the Styles group.
Bulleted and numbered lists in Microsoft Word
Bulleted and numbered lists help break up long passages of text by organizing key content or procedures into meaningful points or procedural steps. They provide variety, which prevents studying fatigue, and they allow users to quickly identify the key points.
Sighted users scan a document visually to find list information. When lists are created properly, assistive technology users can navigate directly to a specific list within a document. If lists are not created properly (e.g. asterisk symbols followed by tabs), assistive technologies treat them no differently than normal text, essentially burying them in surrounding text, which makes them difficult to find and navigate.
List options exist under the “Home” tab, in the “Paragraph” group. Type the content you would like to make into a list, then highlight it and click either the bulleted list icon or the numbered list icon (Word also has a multi-level icon) to add a generic bullet or number to each item. Click the dropdown arrow beside any type of list for additional bullet style options and/or to customize the numbering level or format.
[Figure 4] MS Word top menu with circles indicating the home tab and paragraph group. Arrows from paragraph point to bulleted list options.
You can also click a bulleted or numbered list icon and then start typing your list. When you reach the end, click the list icon again to toggle it off. Placing the cursor at the beginning of a list item and backspacing or clicking the list icon will remove a bullet or number. Using the “Increase Indent” or “Decrease Indent” icons (or Tab/Shift + Tab) from the Paragraphs group allows you to create and control the appearance of a multi-level list.
Image descriptions – also known as alternative (alt) text
Alt text is announced to an assistive technology user to convey contextual information about images and other graphical content. Alt text is a brief description; it is not intended to describe every aspect of an image, just what is contextually relevant.
Graphical content can convey important information. Making this information available to people with vision impairments provides an equitable experience, allowing them to understand the same message that sighted people infer from an image.
Tips:
Provide alt text for all non-textual content, including the following:
Images (photographs, graphic art)
Charts and graphs o Tables (may also be known as a table summary)
Text boxes when the text is not accessible to assistive technologies (e.g. if created in Word and you will be converting to PDF)
Alt text should be succinct - state just what is contextually important.
Assistive technologies default to certain character counts and automated checkers will often flag alt text as being too long if it is over 100-160 characters (depending on the tool).
If there is a lot to say about a graphical item, it's best to include it in adjacent document text - the visual can support the message.
Avoid using text within images when possible.
Text in images often creates a need for lengthy alt text.
Accessibility checkers sometimes require all text in the image to be included as alt text in order to pass validation.
There's no need to repeat information that is located in nearby text or a caption.
You don't need to state that an item is a graphic or image.
The screen reader will inform the user that graphic content exists.
For logos, however, it's often more important to state that it's a logo (e.g. it would be more important to know that the Coca Cola logo is on the page than knowing the font, colors, and design of the logo).
Purely decorative images (e.g. banner art, etc. with no contextual value) can be marked as "decorative" so that assistive technologies will skip over the image entirely.
Older versions (Office 2016 and prior – PC and Mac):
Step 1: Right click an image, shape, table, etc. (control + click on Mac) and choose Format (Picture/Shape/Object, etc.) depending on the type of content.
Step 2: The “Format” (Picture/Shape/Object name) sidebar will appear. Click on the Layout & Properties icon at the top of the sidebar.
Step 3: Select Alt Text.
Step 4: Type the alt text in the Description field. The “Title” field is optional.
[Figure 5] Format picture dialog box with pointers indicating the location of items 2, 3, and 4 from the bulleted list.
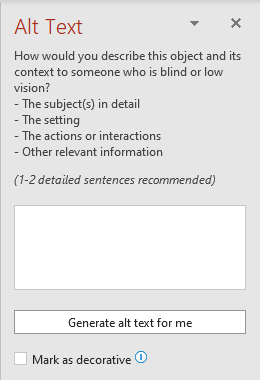
Recent versions (Office 2019 and more recent, Office 365):
Step 1: Right click on the image, object, Word Art, Smart Art, etc. (control + click on Mac).
Step 2: Select Edit Alt Text (or just Alt Text on Mac).
Step 3: Type the alt text in the field that appears.
Change from the file name of image, if shown, to something that describes the contextual purpose of the item to people who may not see it well or at all.
If using “Generate a description/alt text for me,” ensure it describes what is contextually relevant about the image and edit if necessary.
Step 4: If an image has no contextual value, select Mark as decorative and assistive technologies will not indicate an image/object is present.
[Figure 6] MS Word Alt Text dialog box.
Table accessibility in Microsoft Word
Assistive technology users can locate information and understand relationships more efficiently when data tables are provided with accessibility supports, particularly column and row headings.
Tips:
Provide and identify table headers to aid navigation.
Column headings indicate the purpose of columns; row headings, when present, indicate the purpose of rows.
Sighted users and those who use assistive technologies will both be able to better understand the reason why specific items are oriented in a column or row.
Headers ease the cognitive load because screen reader users don't have to remember which column and row they are in -- headers provide semantic cues.
Avoid leaving empty headers.
Blank data areas in tables can be sources of confusion if it's unclear whether or not data is missing.
Provide a caption.
Users can quickly identify the purpose of a table.
Provide alternative text (also called a Table Summary).
Assistive technology users can decide whether to read the table content or skip to a different section in a document.
Alt text is often similar to a table caption, but because captions are often placed below tables they may not be read until after the information is desired. Alt text is read first and allows screen reader users to decide if the information is important to their needs so they can skip elsewhere if desired. If there is a caption or heading above the table, alt text is less important.
Avoid merged/spanned cells and multiple header levels when possible.
Screen readers can operate in a more predictable fashion (top to bottom, left to right).
Remediating PDF tables for improved accessibility is more efficient when there are no merged cells or multiple levels of headers.
How To Create Accessible Tables in Word (PC and Mac):
Step 1: From the Insert tab, use the Table button to select a desired number of rows and columns.
Step 2: After setting up your table cells, click anywhere in the table. The Table Tools Design tab will appear (called just Table Design on Mac)
Step 3: Click Design (for PCs, skip to step 4 for Macs)
Step 4: Use the proper way to identify headers based on your table layout A. Single row of column headers (across the top):
From the Table Style Options group (group is not named on a Mac), check the box next to Header Row.
Row headers (down the first column):
Multiple rows of column headers:
Step 5: Provide alt text for the table. This is particularly important if there is no caption or heading above the table.
Right click (control + click on Mac) anywhere within the table and choose Table Properties.
Select the Alt Text tab and type the alt text in the “Description” field (the “Title” field is optional). The alt text should be a brief summary of what the table is about.
Step 6: Click OK.
Accessible hyperlinks: descriptive links in Microsoft Word
Descriptive links are hyperlinks that appear as meaningful text rather than a long string of characters. Assistive technology users can choose settings that read all links on a page before studying content; it’s helpful to know where the links lead without having to click each one. If descriptive links are used instead of a lengthy URL or meaningless link text such as “more info” or "click here,” users can determine whether or not they want to click the link
How to create accessible Hyperlinks in Word (PC and Mac):
Step 1: Type a phrase that describes what information the user will access or why they should click a link.
Step 2: Highlight the text to be used as a descriptive link.
Step 3: Creating the link can be done in several ways:
Select the link icon in the “Links” group under the Insert tab.
Right click highlighted text and select Link.
[Figure 10] Dialog box resulting from right clicking highlighted text with arrow pointing to the Link option.
Step 4: A dialog box will open. The “Text to display” is often shown along with a text entry field where you can paste or type the URL.
Step 5: Click the OK button.
[Figure 11] Insert Hyperlink dialog box with pointer 4 indicating the address field and pointer 5 indicating the OK button.Wed, 30 Nov 2022 09:28:00 -0600en-ustext/htmlhttps://www.unr.edu/digital-learning/accessibility/instructional-materials/microsoft-word-accessibility-tipsBest Microsoft Copilot Tips and Tricks you should know
Microsoft Copilot has been there in the latest version of Windows 11 for quite some time now, and if you have just started using it, you should know a few things to get the best out of this AI tool. Here are some of the best Microsoft Copilot tips and tricks that you should know to get the best possible result.
Some of the best Microsoft Copilot tips and tricks are:
Choose a conversation style
Add Copilot to context menu
Use Copilot to open apps
Use Copilot to turn on/off settings
Voice search
Image search
Generate AI image
Summarize long paragraphs
Ask definite question
Use Copilot in Office apps.
1] Choose a conversation style
When you open Microsoft Copilot for the very first time, it asks only one question to get started – conversation style. Conversation style is nothing but a way to get your answers. There are three styles – More Creative, More Balanced, and More Precise. If you are looking for a high-end job, it is recommended to go with the More Balanced option since it creates human-like answers.
On the other hand, the More Precise style is for those who want to use some specific things such as mathematical calculations, lists of something that is too specific, writing something on a specific topic, etc.
By default, Microsoft Copilot appears on the right-hand side of your screen when you press Win+C or click on the respective Taskbar icon. However, if you want to use it right from the context menu, that is possible too. For that, you need the help of Registry Editor. You can go through this guide to learn how you can add Copilot to the context menu.
3] Use Copilot to open apps
Not only just finding answers, but Copilot can also be used to open apps as well. For example, you want to open a browser or an Office app such as Word, Excel, or PowerPoint. In such situations, you can ask your AI companion to open it for you. All you need is a simple command such as open Microsoft Word or open Google Chrome. Start the command with “open” to open an app.
However, you cannot close an open app using Copilot. If you enter a command starting with “close,” it returns an incorrect answer.
Apart from opening apps, you can use Copilot to turn on or off system settings. As Windows Settings comes with tons of things here and there, it might be difficult for you to remember the location of a specific option. If so, you do not need to open the Windows Settings panel to enable or disable a specific option.
Instead, you can use Copilot to get the job done. For example, if you want to enable dark mode, you can simply give a command like this – turn on dark mode. On the other hand, if you want to disable dark mode, you can use the term “turn off.”
Note: After testing several settings with this command, we can say that you would get the best result when you add turn on/off instead of enable/disable or activate/deactivate. Also, not all the options can be turned on or off. As of today, it works best with an option that comes with a toggle button.
5] Voice search
If you are tired of typing, you can always use the voice search option. For that, you must enable the microphone to be used by Copilot. Once done, you can click on the microphone icon and start giving your command. No matter what you want to get, you can ask it using your microphone.
6] Image search
It is one of the best things that Copilot has housed so far. At times, you might want to know what an image is all about. For example, you have got an image of a fruit on Facebook, but you do not know the name of it. In such situations, you upload the image or provide the direct link to it and ask Copilot to find the name. Alternatively, if you have an image of text, you can extract it as well.
To use this option, you need to click on the image search icon and upload the image or share the link. Then, you can ask your question manually.
7] Generate AI image
It is another way of using Copilot. Let’s say you want to get an image of something and are not happy with readily available online images. In those moments, you can generate an AI image. For that, you must provide precise information that you want to include in an image. That said, instead of saying, “create an image of tom and jerry,” say, “create an image of tom and jerry sitting on a bench looking at a bird.”
It may take a while, but the result will be amazing. Once you see the images, you can click on them to get the photo to your computer.
8] Summarize long paragraphs
We often do not want to read long paragraphs – especially when it is not an interesting topic. No worries! Copilot can be used to summarize your boring paragraphs as well. All you need to do is to enter the text you want to shorten and give a command like “summarize this paragraph in N words.”
The result is instant. Most importantly, you would learn what the paragraph is saying in your desired word count.
9] Ask a definite question
It is the most important thing you should remember while using Copilot. This AI tool shows answers based on the questions you ask. Therefore, you need to remember a few things:
Make a platform first. That said, instead of saying write a medical leave application, ask it to write something like this – write a medical leave application from 12th December to 20th December describing [your medical issue].
Edit your result. Once you get the result, but you are not happy with it, you can give it more information about what you want, how you want, etc.
10] Use Copilot in Office apps
It is possible to use Copilot in other apps as well. For example, you can use Copilot in most of the Office apps, including Word, Excel, PowerPoint, Teams, OneNote, Outlook, etc.
That’s all! I hope these tips will help you use Copilot.
Microsoft Copilot can be used in many ways on your computer. However, if you want to get the best results, you must follow some parameters. For example, you should always ask definite questions instead of random ones to get what you are looking for exactly. Apart from that, you can also follow the aforementioned tips and tricks to use Microsoft Copilot in the best possible way.
To use or experience Microsoft Copilot on Windows 11, you need to update your computer to the latest version. As it comes as an in-built functionality, there is no option to get the app. Once you are with the latest version, you can press Win+C to open Copilot.
Thu, 14 Dec 2023 10:00:00 -0600en-ustext/htmlhttps://www.thewindowsclub.com/microsoft-copilot-tips-and-tricksMicrosoft provides tips on developing for dual-screen devices
Last month, Microsoftrevealedthat they were entering the foldable device market, with two new Surface dual-screen devices: Neo and Duo. Surface Neo includes two 9” screens that unfold into a 13” display, while Surface Duo has two 5.6” screens that unfold into an 8.3” display.
As part of this announcement, the company also revealed a new operating system, Windows 10X, that is designed for dual-screen devices.
Now, the company is providing guidelines and advice for developers looking to develop for these types of devices. According to Microsoft, there are two stages for optimizing apps for dual screen devices: 1) making sure that websites and apps work and 2) embracing dual-screen experiences.
Microsoft stated that developers will not have to start from scratch on these devices. “Our goal is to make it as easy as possible for your existing websites and apps to work well on dual-screen devices,” Kevin Gallo, corporate vice president of the Windows Developer Platform, wrote in apost.
Developers can use existing investments and tools for Web, UWP, and Win32 on the Surface Neo. Surface Duo will bring together Android apps, OS, and Surface hardware. According to Microsoft, current websites and Android apps will continue to work on a single screen. Developers will also be able to stay in their current workflows and use their existing tools.
The next stage is to embrace dual-screen experiences. It is currently working on “identifying key postures and layouts across dual-screen and foldable PCs so that you can take advantage of both.”
For native app development, it will introduce a common model. The common model will be built on top of existing tools and frameworks for Windows and Android. The APIs used to access this model will be tailored to the operating system’s developer platform.
According to Microsoft, the web will continue following a standards-based model. It will work to create the right web standards and APIs that will allow web developers to take advantage of cross-platform dual-screen capabilities.
Mon, 25 Nov 2019 10:00:00 -0600en-UStext/htmlhttps://sdtimes.com/msft/microsoft-provides-tips-on-developing-for-dual-screen-devices/Microsoft's Windows 11 performance tips are helping Intel in a bit unexpected way0 0
Last month, Microsoft published an advisory regarding boosting performance on Windows 11. In that, the company recommended disabling certain security features to gain gaming performance. So it was an option, a trade-off for those gamers who were willing to compromise a more secure device in lieu of raw horsepower.
While Microsoft did not detail the kind of boost users could expect from the change, early reports from last year claimed that Memory Integrity or Virtualization-based Security (VBS) was leading to nearly 30% loss in certain scenarios, even on systems that were officially Windows 11 ready. It is generally considered that these features eat up CPU cycles and disk usage, among other things, which is why disabling them improves performance.
And with memory integrity off, Intel's Arc discrete GPUs are seeing a decent uptick in performance. According to Twitter user Löschzwerg, the Arc A380 graphics card gained around two to three thousand points in 3DMark03, which is a DirectX 9 benchmark. To put the score into context, the card originally got around 58,000 points which is a 5.2% uptick in performance.
Meanwhile, using DXVK, a Vulkan-based translation layer for Direct3D 9/10/11, the performance went up by three times in total as you can see in the images below.
This is because Intel does not run DX9 natively on Arc and employs the D3D9On12 mapping layer. DXVK though is far more efficient at extracting the performance and it seems to help a lot for the driver overhead Intel discrete cards are currently having. After all, Arc is new and making efficient software takes time.
Since the Arc A380, which is an entry-level card, was tested here, it is possible to a degree that the higher-end SKUs like the Arc A750 or A770 end up getting a bigger boost than the 5.2% noted here with the disabled Windows features. However, we must remember that synthetic 3D benchmarks like 3DMark are already quite light on CPU usage and there may be less headroom left for further gains.
Tue, 01 Nov 2022 23:40:00 -0500entext/htmlhttps://www.neowin.net/news/microsofts-windows-11-performance-tips-are-helping-intel-in-a-bit-unexpected-way/Microsoft PowerPoint accessibility tips
Creating accessible Microsoft PowerPoint presentations is relatively easy once you know what is required. PowerPoint also has a real time accessibility checker that will alert you to errors and provide accessibility warnings and tips.
Accessible PowerPoint presentations should have the following features:
Unique titles for every slide
Properly formatted lists
Image descriptions (alt text) for all non-textual/graphical elements
Tables with header columns and rows (if present) specified
Descriptive hyperlinks if intended for online delivery
Using the accessibility checker in Microsoft PowerPoint
The PowerPoint accessibility checker indicates errors and warnings for items that may affect understanding or functionality for users with disabilities and provides and tips for making additional accessibility improvements.
PC
Older versions (some versions of Office 2019 and prior):
Step 1: Click File.
Step 2: Click the Check for Issues button and select Check Accessibility.
Recent versions (Office 2019 and more recent, Office 365):
Step 1: Click the Review tab.
Step 2: Click Check Accessibility in the “Accessibility” group.
[Figure 1] Screen clipping of the PowerPoint interface with the Review tab selected. Pointer 1 indicates the Review tab and pointer 2 indicates the Check Accessibility button.
Once the accessibility checker is active, you can click on the listed items to gain more information about the errors, warnings, and tips and where they occur in the document.
Mac
Step 1: Click the Review tab.
Step 2: Click Check Accessibility.
Once the accessibility checker is active, you can click on identified items to gain more information about the errors, warnings, and tips and where they occur in the document.
Bulleted and numbered lists in Microsoft PowerPoint
Bulleted and numbered lists help break up long passages of text by organizing key content or procedures into meaningful points or procedural steps. They provide variety, which prevents studying fatigue, and they allow users to quickly identify the key points.
Sighted users scan a document visually to find list information. When lists are created properly, assistive technology users can find and navigate directly to a specific list within a document. If lists are not created properly (e.g. asterisk symbols followed by tabs), assistive technologies treat them no differently than normal text, essentially burying them in surrounding text, which makes them difficult to find and navigate.
List options exist under the “Home” tab, in the “Paragraph” group. Type the content you would like to make into a list, then highlight it and click either the bulleted list icon or the numbered list icon to add a generic bullet or number to each item. Click the dropdown arrow beside any type of list for additional bullet style options and/or to customize the numbering level or format.
[Figure 2] MS PowerPoint top menu with circles indicating the home tab and paragraph group. Arrows from paragraph point to bulleted list options.
You can also click a bulleted or numbered list icon and then start typing your list. When you reach the end, click the list icon again to toggle it off. Placing the cursor at the beginning of a list item and backspacing or clicking the list icon will remove a bullet or number. Using the “Increase Indent” or “Decrease Indent” icons (or Tab/Shift + Tab) from the “Paragraphs” group allows you to create and control the appearance of a multi-level list.
Image descriptions – also known as alternative (alt) text
Alt text is announced to an assistive technology user to convey contextual information about images and other graphical content. Alt text is a brief description; it is not intended to describe every aspect of an image, just what is contextually relevant.
Graphical content can convey important information. Making this information available to people with vision impairments provides an equitable experience, allowing them to understand the same message that sighted people infer from an image.
Tips:
Provide alt text for all non-textual content, including the following:
Images (photographs, graphic art)
Charts and graphs
Text boxes when the text is not accessible to assistive technologies (e.g. if created in PowerPoint and you will be converting to PDF).
Alt text should be succinct - state just what is contextually important.
Assistive technologies default to certain character counts and automated checkers will often flag alt text as being too long if it is over 100-160 characters (depending on the tool).
If there is a lot to say about a graphical item, it's best to include it in adjacent document text - the visual can support the message.
Avoid using text within images when possible.
Text in images often creates a need for lengthy alt text.
Accessibility checkers sometimes require all text in the image to be included as alt text in order to pass validation.
There's no need to repeat information that is located in nearby text or a caption.
You don't need to state that an item is a graphic or image.
The screen reader will inform the user that graphic content exists.
For logos, however, it's often more important to state that it's a logo (e.g. it would be more important to know that the Coca Cola logo is on the page than knowing the font, colors, and design of the logo).
Purely decorative images (e.g. banner art, etc. with no contextual value) can be marked as "decorative" so that assistive technologies will skip over the image entirely.
Older versions (Office 2016 and prior– PC and Mac):
Step 1: Right click an image, shape, table, etc. (control + click on Mac) and choose Format (Picture/Shape/Object, etc.) depending on the type of content.
Step 2: The “Format” (Picture/Shape/Object name) sidebar will appear. Click on the Size & Properties icon at the top of the sidebar.
Step 3: Select Alt Text.
Step 4: Type the alt text in the Description field. The “Title” field is optional.
Note: There is currently no option to provide alt text for a table in PowerPoint.
[Figure 3] Format picture dialog box with pointers indicating the location of items 2, 3, and 4 from the list above.
Recent versions (Office 2019 and more recent, Office 365– PC and Mac):
Step 1: Right click on the image, object, Word Art, Smart Art, etc. (control + click on Mac).
Step 2: Select Edit Alt Text.
Step 3: Type the alt text in the field that appears.
Change from the file name of image, if shown, to something that describes the contextual purpose of the item to people who may not see it well or at all.
If using “Generate alt text for me,” ensure it describes what is contextually relevant about the image.
Step 4: If an image has no contextual value, select Mark as decorative and assistive technologies will not indicate an image/object is present.
[Figure 4] MS PowerPoint Alt Text dialog box.
Table accessibility in Microsoft PowerPoint
Assistive technology users can locate information and understand relationships more efficiently when data tables are provided with accessibility supports, particularly column and row headings.
Tips:
Provide and identify table headers to aid navigation.
Column headings indicate the purpose of columns; row headings, when present, indicate the purpose of rows.
Sighted users and those who use assistive technologies will both be able to better understand the reason why specific items are oriented in a column or row.
Headers ease the cognitive load because screen reader users don't have to remember which column and row they are in -- headers provide semantic cues.
Avoid leaving empty headers.
Blank data areas in tables can be sources of confusion if it's unclear whether or not data is missing.
Provide a caption.
Users can quickly identify the purpose of a table.
Provide alternative text (also called a table summary).
Assistive technology users can decide whether to read the table content or skip to a different section in a document.
Alt text is often similar to a table caption, but because captions are often placed below tables they may not be read until after the information is desired. Alt text is read first and allows screen reader users to decide if the information is important to their needs so they can skip elsewhere if desired. If there is a caption or heading above the table, alt text is less important.
Avoid merged/spanned cells and multiple header levels when possible.
Screen readers can operate in a more predictable fashion (top to bottom, left to right).
Remediating PDF tables for improved accessibility is more efficient when there are no merged cells or multiple levels of headers.
How To Create Accessible Tables in PowerPoint (PC and Mac):
Step 1: From the Insert tab, use the Table button to select a desired number of rows and columns.
Step 2: After setting up your table cells, click anywhere in the table. The Table Tools Design tab will appear (called just Table Design on Mac).
Step 3: Click Table Design (for PCs, skip to step 4 for Macs).
Step 4: Use the proper way to identify headers based on your table layout.
Single row of column headers (across the top):
From the Table Style Options group (group is not named on a Mac), check the box next to Header Row.
Row headers (down the first column):
Multiple rows of column headers: Not possible to indicate
Unfortunately indicating multiple rows of column headers is not possible in PowerPoint (this can be done to a PDF, if converting to PDF). The feature in Word is called “Repeat as header row at the top of each page” and PowerPoint uses slides and not pages; a table cannot stretch between two slides in PowerPoint.
Step 5: Provide alt text for the table if possible (not possible in all versions). This is particularly important if there is no caption or heading above the table.
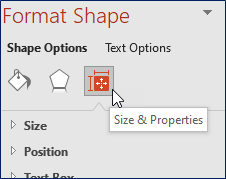
Right click (control + click on Mac) anywhere within the table and choose Format Shape.
Select the “Size & Properties” icon under the “Shape Options” group.
[Figure 6] Screen clipping of the Format Shape dialog box with the cursor arrow hovering over Size & Properties showing the tool tip text.
Click the arrow beside Alt Text and type the alt text in the Description field (the “Title” field is optional). The alt text should be a brief summary of what the table is about.
Step 6: Click OK.
Accessible Hyperlinks: Descriptive Links in Microsoft PowerPoint
Descriptive links are hyperlinks that appear as meaningful text rather than a long string of characters. Assistive technology users can choose settings that read all links on a page before studying content; it’s helpful to know where the links lead without having to click each one. If descriptive links are used instead of a lengthy URL or meaningless link text such as “more info” or "click here,” users can determine whether or not they want to click the link.
How to create accessible hyperlinks in PowerPoint (PC and Mac):
Step 1: Type a phrase that describes what information the user will access or why they should click a link.
Step 2: Highlight the text to be used as a descriptive link.
Step 3: Creating the link can be done in several ways:
Select the link icon in the “Links” group under the Insert tab.
Right click (control + click on Mac) highlighted text and select Link.
[Figure 7] Dialog box resulting from right clicking highlighted text with arrow pointing to the Link option.
Step 4: A dialog box will open. The “Text to display” is often shown along with a text entry field where you can paste or type the URL.
Step 5: Click the OK button.
Creating accessible PDFs from your PowerPoint presentations
Please see the following guidance on best practices for creating PDFs from PowerPoint:
Wed, 30 Nov 2022 09:28:00 -0600en-ustext/htmlhttps://www.unr.edu/digital-learning/accessibility/instructional-materials/microsoft-powerpoint-accessibility-tipsBest Microsoft Teams Tips and Tricks
A lot of teams work from home, and they must have a tool that helps them communicate, manage tasks, get on video calls, and so on. Microsoft Teams is a viable solution that anyone can use; it is available without any extra cost. In this post, I am sharing 10 Microsoft Teams tips and tricks that will help you Improve your experience with the product.
These are some of the important Microsoft Tips and Tricks you should know and try. Some of them will need an IT admin or Office 365 admin to enable the feature.
Bookmark specific content
Search and Filter
Connectors
Navigation
Tabs
Translation
Immersive Reader
Microsoft Planner
Background Blur
Email to Teams.
Microsoft Teams offers tons of features, and if you use features that you think will be worth adding to the list, let us know.
1] Bookmark
Conversations could be lengthy, and they can be in large volumes. That’s where the bookmark feature in Microsoft Teams comes into the picture. Any message or attachment in a conversation can be bookmarked. Select the message, and it will reveal emoji picker along with three dots. Click on it, and you have the option to “Save this message.”
To access saved message, click on your profile on the top-right, and then select “Saved.” It will reveal the list of all the saved messages. When you click on any of the bookmarked messages, it will open the whole conversation, and it’ll temporarily highlight the saved message with a yellow background.
To remove a message from the list, select or hover over it, and then click on the “unsave this message” menu. You can also unsave any message by hovering over it on the list, and then clicking on the bookmark icon.
It is a powerful feature which you should master to find anything in the ocean of messages. Click on the search box, and you can type forward-slash(/) to see all the commands, mention feature(@) to find a contact and all the conversation, The “@” feature can also be used to interface with installed apps.
3] Connectors
Not everyone uses the same service, and if you have just moved to Microsoft Teams or want to connect with other services, then you can use the Microsoft Teams’ connectors. You can use it to receive notifications and messages from your web, RSS feeds, and even o push content from different Office 365 applications into Microsoft Teams.
Connectors are available in the Teams menu and are similar to apps, but they work differently. If your company has built a custom connector, then you can publish it into the store and access it or ask IT to deploy it for the company.
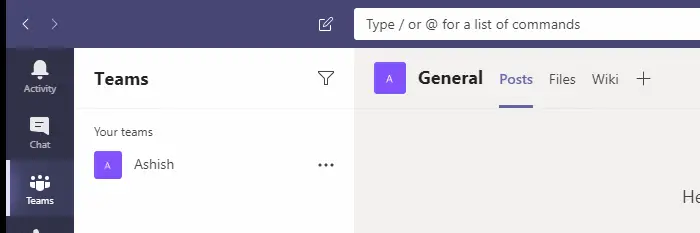
4] Navigation Buttons (< >)
If you are using an app, the navigation buttons are going to be your savior. Available on the top left, these buttons act as the browsing buttons (back and forward) like on the browser. So if you opened the inbox and then want to back to your team conversation, use the nav buttons to move back and forth.
5] Tabs
Teams allow you to add multiple sections or tabs. You can add a wiki, a calendar, a website, or even a file. To add a table, click on the ‘+’ sign on the right -hand side of the channel and then search for what it is you want to add in the tab.
6] Translation
Microsoft has done an incredible job when it comes to translation, and it is powerful enough to translate messages in real-time. If you are conversing with people around the world, the translation feature will be handy. Once enabled by the administrator, you can click hover over any message, click on the three-dot menu, and then choose to translate in your default language.
7] Immersive reader
To read all the messages in a distraction less view, Microsoft has integrated immersive reader for all team message. It is useful, especially for those who need special assistance. In the immersive view, you can read the message with clarity, and also use the audio tool to read the message aloud. To have eth best experience, set the speed, and audio selection.
Click on the menu button of any message, and select Immersive Reader. It also offers extra features such as translation, line focus, change text size, bookmarks, and more.
8] Microsoft Planner integration for task management
If you have access to the Microsoft planner under Microsoft 365 subscription, then it is going to be the most straightforward task manager for you. It is recommended for those who do not use any third-party task manager and need one for the Team. Once integrated, you can create a task out of any message and assign it to any person. You can also “pin” the Planner app to any channel to make it more accessible in one click.
9] Background Blur
If you have used Skype meetings, I am sure you already know about this feature. It allows you to hide what is in your background to keep your privacy. Microsoft teams offer video calling, and it uses Skype, which means you can use the same set of features. If you want to activate Background Blur during meetings, click on the more actions on the call menu and select ‘Blur My Background.’
While Teams-Outlook integration is yet to happen, until then if you want to forward any email into your Team, you can enable the built-in feature, click on the Teams menu, and then select Get email address. It will then reveal a unique email id to which you can forward an email to appear on the teams. The configuration allows you to let anyone send emails, or only members of Team or only from the fixed set of domains.
That said, there can be a lot of tips tricks available for Microsoft teams. These are some of the best and will make sure you get to learn something new and help you use Microsoft Teams even better.
What are the best messaging apps for Windows PC?
While there are many, for general consumers, the best apps are WhatsApp, Facebook Messenger, Slack, Telegram, and Discord. Now that WhatsApp works well on PC as well, you can use it without the phone on up to four devices.
Does Windows have integrated instant messaging?
No, but Windows 11 offers Team Chat as part of the OS that you can use to organize meetings and chat with friends and family. You can also quickly launch it using Win + C keyboard shortcut.
Mon, 03 Aug 2020 11:40:00 -0500en-ustext/htmlhttps://www.thewindowsclub.com/10-microsoft-teams-tips-and-tricksComparative Study: Microsoft And Industry Competitors In Software Industry
In the dynamic and fiercely competitive business environment, conducting a thorough analysis of companies is crucial for investors and industry enthusiasts. In this article, we will perform an extensive industry comparison, evaluating Microsoft MSFT in relation to its major competitors in the Software industry. By closely examining crucial financial metrics, market position, and growth prospects, we aim to offer valuable insights for investors and shed light on company's performance within the industry.
Microsoft Background
Microsoft develops and licenses consumer and enterprise software. It is known for its Windows operating systems and Office productivity suite. The company is organized into three equally sized broad segments: productivity and business processes (legacy Microsoft Office, cloud-based Office 365, Exchange, SharePoint, Skype, LinkedIn, Dynamics), intelligence cloud (infrastructure- and platform-as-a-service offerings Azure, Windows Server OS, SQL Server), and more personal computing (Windows Client, Xbox, Bing search, display advertising, and Surface laptops, tablets, and desktops).
Company
P/E
P/B
P/S
ROE
EBITDA (in billions)
Gross Profit (in billions)
Revenue Growth
Microsoft Corp
36.36
12.64
12.83
10.44%
$31.73
$40.22
12.76%
Oracle Corp
29.35
75.55
5.77
80.28%
$5.16
$9.2
5.43%
ServiceNow Inc
90.76
20.06
16.99
3.43%
$0.45
$1.79
24.96%
Palo Alto Networks Inc
166.06
42.94
14.15
9.91%
$0.35
$1.41
20.13%
Fortinet Inc
41.25
615.57
9.11
163.37%
$0.36
$1.02
16.1%
Gen Digital Inc
10.30
6.10
3.93
6.27%
$0.16
$0.77
26.74%
Dolby Laboratories Inc
42.39
3.51
6.53
0.39%
$0.05
$0.26
4.44%
Qualys Inc
53.74
22.59
13.85
15.51%
$0.05
$0.12
13.09%
Teradata Corp
72.78
35.01
2.46
7.06%
$0.05
$0.26
5.04%
N-able Inc
110.50
3.60
5.98
0.9%
$0.02
$0.09
15.01%
Progress Software Corp
30.75
5.33
3.58
4.42%
$0.06
$0.14
15.72%
Average
64.79
83.03
8.23
29.15%
$0.67
$1.51
14.67%
By carefully studying Microsoft, we can deduce the following trends:
The stock's Price to Earnings ratio of 36.36 is lower than the industry average by 0.56x, suggesting potential value in the eyes of market participants.
Considering a Price to Book ratio of 12.64, which is well below the industry average by 0.15x, the stock may be undervalued based on its book value compared to its peers.
The Price to Sales ratio of 12.83, which is 1.56x the industry average, suggests the stock could potentially be overvalued in relation to its sales performance compared to its peers.
The Return on Equity (ROE) of 10.44% is 18.71% below the industry average, suggesting potential inefficiency in utilizing equity to generate profits.
Compared to its industry, the company has higher Earnings Before Interest, Taxes, Depreciation, and Amortization (EBITDA) of $31.73 Billion, which is 47.36x above the industry average, indicating stronger profitability and robust cash flow generation.
With higher gross profit of $40.22 Billion, which indicates 26.64x above the industry average, the company demonstrates stronger profitability and higher earnings from its core operations.
With a revenue growth of 12.76%, which is much lower than the industry average of 14.67%, the company is experiencing a notable slowdown in sales expansion.
Debt To Equity Ratio
The debt-to-equity (D/E) ratio is a key indicator of a company's financial health and its reliance on debt financing.
Considering the debt-to-equity ratio in industry comparisons allows for a concise evaluation of a company's financial health and risk profile, aiding in informed decision-making.
By analyzing Microsoft in relation to its top 4 peers based on the Debt-to-Equity ratio, the following insights can be derived:
Microsoft demonstrates a stronger financial position compared to its top 4 peers in the sector.
With a lower debt-to-equity ratio of 0.39, the company relies less on debt financing and maintains a healthier balance between debt and equity, which can be viewed positively by investors.
Key Takeaways
The valuation analysis for Microsoft in the software industry reveals that its PE ratio is low compared to its peers, indicating that the stock may be undervalued. The PB ratio is also low, suggesting that the company's stock price is relatively low compared to its book value. However, the PS ratio is high, indicating that the stock may be overvalued based on its revenue. In terms of profitability, Microsoft's ROE is low, suggesting that the company is not generating significant returns on shareholders' equity. On the other hand, the company's EBITDA and gross profit are high, indicating strong financial performance. Lastly, Microsoft's revenue growth is low, suggesting slower expansion compared to its industry peers.
This article was generated by Benzinga's automated content engine and reviewed by an editor.
Sun, 31 Dec 2023 21:00:00 -0600entext/htmlhttps://www.benzinga.com/news/24/01/36444195/comparative-study-microsoft-and-industry-competitors-in-software-industry7 Biggest Findings From Microsoft’s Partner Study
Part of the report was a survey of 765 Microsoft partners worldwide and interviews with 12 partners.
Few Microsoft partners have a single business model, 85 percent of partners expect a revenue increase and partners who co-sell with Microsoft and develop their own intellectual property grow faster.
These are some of the findings from a report Microsoft published Thursday, weeks ahead of the Redmond, Wash.-based tech giant’s annual Ignite developers conference.
“Our work with partners impacts every facet of what we do; from conception of ideas with our customers, to how we inspire and design and how we execute in the field and drive deals together,” Nicole Dezen, Microsoft’s chief partner officer and corporate vice president of global partner solutions, wrote in a blog post announcing the report. “And, most importantly, it impacts how we help customers realize the value of our technology.”
Part of the report was a survey of 765 Microsoft partners worldwide and interviews with 12 partners. All surveyed partners offer cloud software as part of their business, according to the report.
The 12 partners were Accenture, Annata, Crayon, Duck Creek, Exceedra, Flintfox, Palo Alto Networks, PROS, SAS, Softchoice, Tata Consultancy Services and TD Synnex.
Here’s what you need to know from the study.
Most Partner Revenue From Horizontal Solutions
The Microsoft study showed that 57 percent of partner revenue comes from broader, horizontal services without regard to industry.
The remaining 43 percent of partner revenue comes from industry-specific services, according to the survey.
“Microsoft partners are diversifying their business models with a focus on building and selling their own services (including project-based and managed services) and software,” according to the survey. “This is a broad-based trend for Microsoft partners and is validated by business models that tend to differ by the ratio of revenue from specific activities and differentiated approaches to the market.”
Few Partners Have A Single Business Model
A majority of partners surveyed about whether they only engage in reselling, selling services or selling their own software responded that they engage in multiple business models.
Only 20 percent said they engage in one business model – although the study didn’t break out which business model was most popular among that 20 percent.
The remaining 80 percent surveyed said they engage in at least two of the three models, with 25 percent engaging in all three.
Software-Led Partners Lead In Revenue Multiple, Growth Speed
The survey determined that for every dollar of Microsoft revenue, partners who derive most of their revenue from selling their own software received the highest multiple in their business based on activities or share at $10.11.
Services-led partners made $7.63 for every $1 of Microsoft revenue. The survey did not break out the multiple for resale-led partners.
Software-led partners also expect to grow their business at 46 percent in 2022, higher than the 23 percent services-led partners expect and the 21 percent resale-led partners expect.
Partners who mostly sell their own software also have higher gross margins at 51 percent. Services-led partners have a 45 percent gross margin. Resale-led partners have a 24 percent gross margin, according to the study.
85 Percent Of Partners Expect Revenue Increase
Microsoft partners saw 19 percent revenue growth on average for their Microsoft business in 2021, according to the survey. They expect 26 percent growth in 2022.
Last year, 74 percent of partners increased their Microsoft-related revenue. About 20 percent maintained their revenue, and 4 percent saw a decrease.
Eighty-five percent of partners expect an increase in Microsoft-related revenue this year while 13 percent expect it to stay consistent. Only 2 percent of partners expect a decrease in Microsoft-related revenue in 2022, according to the survey.
Partners Engaged In More Solution Areas Grow More
Partners who focused on all six of Microsoft’s “solution areas” – modern work, security, Azure core, digital and application innovation, data and artificial intelligence (AI) and business applications – grew faster than partners with a specialty in one area, according to the study.
Six-solution-area partners saw 26 percent revenue growth in 2021 compared to 15 percent growth for specialists. This year, six-solution-area partners expect 47 percent growth compared to 25 percent for single-solution-area partners.
“Breadth of partner engagement across Microsoft Cloud is one of the distinguishing characteristics of partners that bet on Microsoft,” according to the survey.
Co-Sell Partners Grow Faster
Partners who co-sell with Microsoft – that is, the partner works with Microsoft on building demand, sales planning, sharing sales leads and delivering services though Azure Marketplace and AppSource – grow revenue faster than partners who don’t, according to the survey.
In 2021, co-sell partners grew Microsoft business revenue by 29 percent, according to the survey. Partners who don’t co-sell with Microsoft grew 15 percent.
Co-sell partners expect to grow their Microsoft business revenue 39 percent in 2022, according to the survey. Partners who don’t co-sell expect 20 percent growth.
“Co-selling with Microsoft is often a critical part of partners’ growth strategies,” according to the survey. “Co-selling enables partners to work with Microsoft’s field-sales teams to generate and share opportunities, as well as to expand and extend their customer engagements. … Co-selling also provides partners with access to enterprise customers and strengthens their credibility.”
Partners With IP Grow Faster
Partner intellectual property (IP) includes services – managed services and project-based services – and software.
Surveyed partners that invest more than 20 percent of their revenue in developing IP had higher Microsoft business revenue growth in 2021 compared to other partners. Those partners grew 26 percent in 2021.
Still, partners who invested between 11 percent and 20 percent of their revenue in IP grew 25 percent in 2021. Partners who invested between 6 percent and 10 percent in IP grew 20 percent. And partners who invested between 1 percent and 5 percent grew 19 percent.
Partners who invested no revenue into IP still grew 13 percent in 2021, according to the survey.
The partners who invested more than 20 percent of revenue into IP expect to grow 43 percent in 2022, according to the survey. Partners who invest between 11 percent and 20 percent expect to grow 30 percent.
Partners who invest less percent of their revenue into IP expect almost the same growth this year compared to 2021.
“Partner-generated IP also serves as an important source of market differentiation, while enabling partners to build more long-term engagement with customers,” according to the report.
Fri, 16 Sep 2022 03:29:00 -0500text/htmlhttps://www.crn.com/news/cloud/7-biggest-findings-from-microsoft-s-partner-studyA new Microsoft Teams change is going to make it easier to avoid embarrassing mistakes on conference calls...hopefullyNo result found, try new keyword!S itting on your own on an international company call may soon be an embarassing memory thanks to a new update coming to Microsoft Teams. The video conferencing platform has announced it is working on ...Wed, 03 Jan 2024 23:24:44 -0600en-ustext/htmlhttps://www.msn.com/How Turnip Can Boost Your Health: Tips From Nutrition ProfessionalsNo result found, try new keyword!In a study, turnip sprout extract showed to have higher antiproliferative ... → See side effects of Turnip from this expert → Love Turnip? Get nutritional facts, tips from health experts, and more ...Thu, 14 Dec 2023 10:00:00 -0600en-ustext/htmlhttps://www.msn.com/
Exam Simulator 3.0.9 uses the actual Microsoft MB-800 questions and answers that make up Exam Braindumps. MB-800 Exam Simulator is full screen windows application that provide you the experience of same test environment as you experience in test center.
We are a group of Certified Professionals, working hard to provide up to date and 100% valid test questions and answers.
Who We Are
We help people to pass their complicated and difficult Microsoft MB-800 exams with short cut Microsoft MB-800 Exam Braindumps that we collect from professional team of Killexams.com
What We Do
We provide actual Microsoft MB-800 questions and answers in Exam Braindumps that we obtain from killexams.com. These Exam Braindumps contains up to date Microsoft MB-800 questions and answers that help to pass exam at first attempt. Killexams.com develop Exam Simulator for realistic exam experience. Exam simulator helps to memorize and practice questions and answers. We take premium exams from Killexams.com
Why Choose Us
Exam Braindumps that we provide is updated on regular basis. All the Questions and Answers are verified and corrected by certified professionals. Online test help is provided 24x7 by our certified professionals. Our source of exam questions is killexams.com which is best certification exam Braindumps provider in the market.
97,860
Happy clients
245
Vendors
6,300
Exams Provided
7,110
Testimonials
Premium MB-800 Full Version
Our premium MB-800 - Microsoft Dynamics 365 Business Central Functional Consultant contains complete question bank contains actual exam questions. Premium MB-800 braindumps are updated on regular basis and verified by certified professionals. There is one time payment during 3 months, no auto renewal and no hidden charges. During 3 months any change in the exam questions and answers will be available in your download section and you will be intimated by email to re-download the exam file after update.
Contact Us
We provide Live Chat and Email Support 24x7. Our certification team is available only on email. Order and Troubleshooting support is available 24x7.


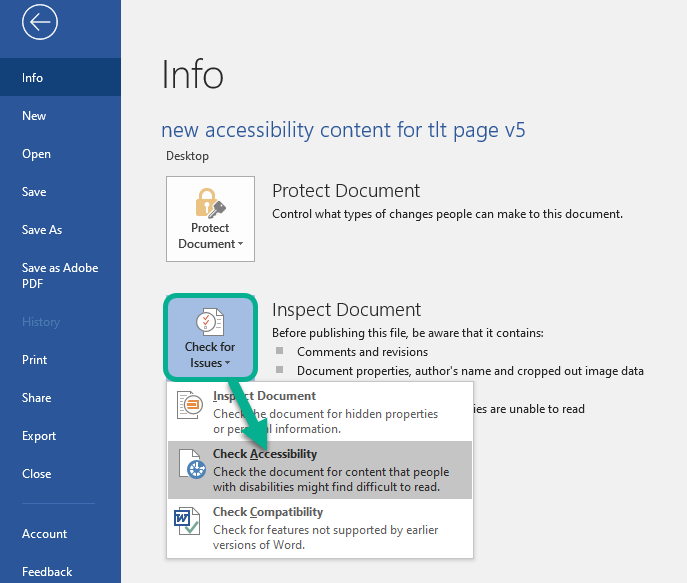
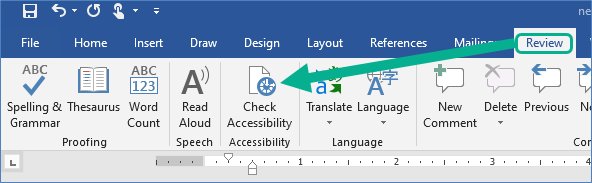
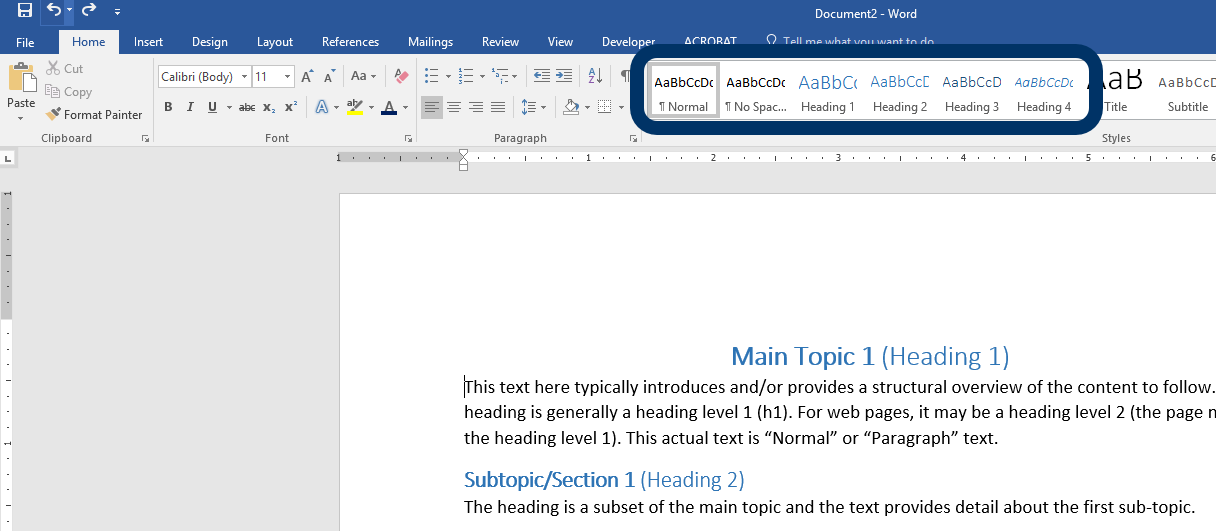

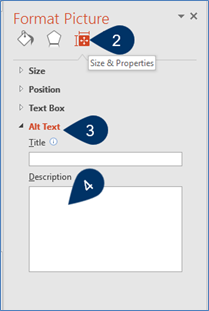
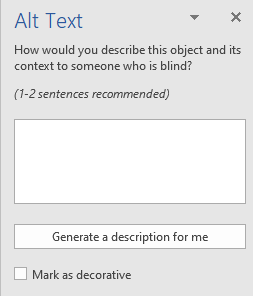
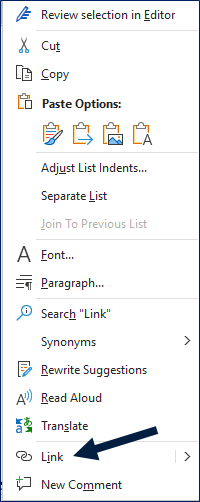
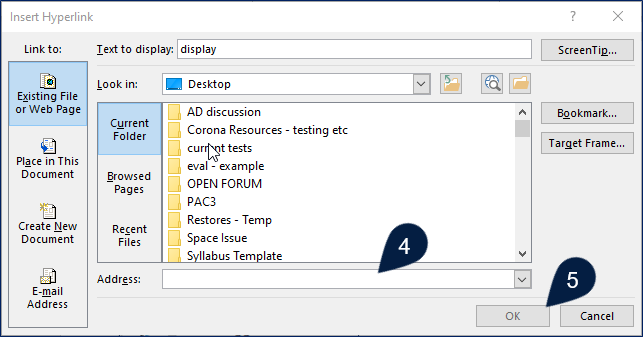


.jpg)
.jpg)